setting up the blog
Using HUGO instead of a fancy CMS, it took no time at all.
Goal#
Use an already overworked raspberrypi to serve a staticly generated Blog
If you are reading this, it means it worked!
Components#
from the lower layer up, let’s go!
Hardware#
My good old raspberrypi, somehow still running after too many years of service.
All of this time, working in the dark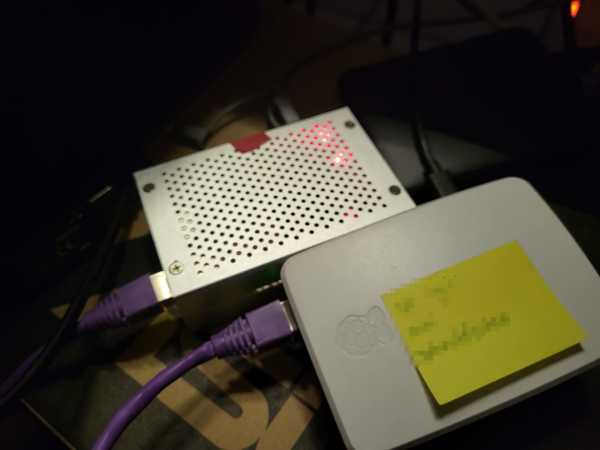
Network#
Router#
An even older ADSL Modem/Router/Firewall from my ISP. It allows me to forward port
80 and 443
to the raspberry so that’s cool
Windows on the rpi?! are you sure?
fbtd.internet-box.ch
An Ethernet cable#
I mean.. its important
DNS#
To manage the DNS zone I am using my provider’s dashboard.
For this project I simply created an alias:
blog.fbtd.ovh to fbtd.internet-box.ch (line 14 below)
Let’s check out the lookup:
 0$ dig blog.fbtd.ovh
 1
 2; <<>> DiG 9.18.33-1~deb12u2-Debian <<>> blog.fbtd.ovh
 3;; global options: +cmd
 4;; Got answer:
 5;; ->>HEADER<<- opcode: QUERY, status: NOERROR, id: 58201
 6;; flags: qr rd ra; QUERY: 1, ANSWER: 2, AUTHORITY: 0, ADDITIONAL: 1
 7
 8;; OPT PSEUDOSECTION:
 9; EDNS: version: 0, flags:; udp: 1232
10;; QUESTION SECTION:
11;blog.fbtd.ovh.                 IN      A
12
13;; ANSWER SECTION:
14blog.fbtd.ovh.          3600    IN      CNAME   fbtd.internet-box.ch.
15fbtd.internet-box.ch.   300     IN      A       188.61.51.128
16
17;; Query time: 292 msec
18;; SERVER: 192.168.1.2#53(192.168.1.2) (UDP)
19;; WHEN: Sat Jul 19 09:55:06 CEST 2025
20;; MSG SIZE rcvd: 92- line 15: the actual A entry is maintained by my ISP
nginx#
nginx is not just a reverse proxy, it can also be used as a very basic web server
I’ll be using it to serve files from /var/www/blog. The configuration is straight forward: prepare a site in the site-available folder and a symbolic link to it in sites-enabled
remember to reload nginx’s configuration
0# FILE: /etc/nginx/sites-available/blog
1server {
2        server_name blog.fbtd.ovh;
3        root /home/fbtd/blog/public;
4        index index.html;
5        location / {
6                try_files $uri $uri/ =404;
7        }
8    listen 80;
9}
sudo ln -s ../sites-available/blog /etc/nginx/sites-enabled/blog
ll /etc/nginx/sites-enabled/blog
# lrwxrwxrwx 1 root root 23 Jul 18 23:26 /etc/nginx/sites-enabled/blog -> ../sites-available/blog
sudo systemctl reload nginxHTTPS#
A bit of Let’s Encrypt on top to for HTTPS support:
sudo certbot --nginx -d blog.fbtd.ovh
# ...
# http-01 challenge for blog.fbtd.ovh
# ...
# Deploying Certificate to VirtualHost /etc/nginx/sites-enabled/blog
# Redirecting all traffic on port 80 to ssl in /etc/nginx/sites-enabled/blog
# ...
# Congratulations! You have successfully enabled https://blog.fbtd.ovh
# ...- --nginx certbot comes with a very handy nginx plugin that takes care of everything
- -d DOMAIN request a certificate for the domain blog.fbtd.ovh
HUGO#
I am still missing files to serve… The whole point of this project is to use HUGO to create a Blog
Hugo is one of the most popular open-source static site generators.
With its amazing speed and flexibility, Hugo makes building websites fun again
– HUGO’s homepage
Installation#
HUGO was very easy to install, simply following the instructions
and choosing the extended version (needed for some theme, like terminal, see below)
the CLI comes with some great autocompletion/help, but I had to install it manually
1mkdir -p ~/.local/share/hugo
2hugo completion bash > ~/.local/share/hugo/completion.sh
3echo ".  ~/.local/share/hugo/completion.sh" >> ~/.bashrc_local
4exec bash
5hugo new # tab tab to trigger autocomplete
6# content  (Create new content)
7# theme    (Create a new theme)
8# site (Create a new site)- line 3: you might want to put it directly in your
.bashrcinstead - line 4: replace the current bash process with a new one, to reload the
.bashrc
new site#
With one command HUGO creates a new folder for the site. Now I need to turn it into a git repository
hugo new site fbtd_blog
cd !$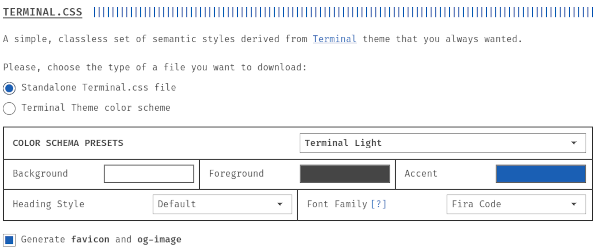
git initTheme#
Next step: let’s choose a theme. I went for Terminal, an awesome theme by pnar that includes everything I need
Features
fully customizable color schemes generated by Terminal.css.
Fira Code as default monospaced font. It’s gorgeous!
really nice duotone, custom syntax highlighting based on Chroma (fast, built-in Hugo syntax highlighter)
fully responsive
fully based on Hugo ecosystem (Pipes and Modules)
– Terminal’s GitHub repo
It even comes with a custom css and assets generator
I installed it as described in the README: git submodule add -f https://github.com/panr/hugo-theme-terminal.git themes/terminal
Customization#
HUGO’s configuration file, hugo.toml needs to be updated to make use of the Terminal theme and to set important information abut the site. Included below are just the most important settings.
Check out the themes/terminal/exampleSite/config.toml or the official documentation for more details
 0# FILE: hugo.toml
 1baseURL = 'https://blog.fbtd.ovh'
 2languageCode = 'en-us'
 3title = 'fbtd blog'
 4subtitle = 'Fabiano Taddei - welcome to my blog'
 5theme = 'terminal'
 6
 7[params]
 8  contentTypeName = "posts"
 9...
10[markup]
11  [markup.highlight]
12 style = 'igor'- line 5: tells HUGO to use the Terminal’s theme
- line 12: use a light colorscheme for code blocks
If you want the full thing:
hugo.toml (complete)
 0baseURL = 'https://blog.fbtd.ovh'
 1languageCode = 'en-us'
 2title = 'fbtd blog'
 3subtitle = 'Fabiano Taddei - welcome to my blog'
 4theme = 'terminal'
 5
 6[params]
 7  contentTypeName = "posts"
 8  showMenuItems = 42
 9  fullWidthTheme = true
10  centerTheme = false
11  readingTime = true
12  readMore = "Read more"
13  menuMore = "Show more"
14
15[languages]
16  [languages.en]
17    title = 'fbtd blog'
18    subtitle = 'Fabiano Taddei - welcome to my blog'
19    keywords = ""
20    copyright = "© Fabiano Taddei 2025 :: Powered by Hugo :3"
21    menuMore = "Show more"
22    readMore = "Read more"
23    readOtherPosts = "Read other posts"
24
25    [languages.en.params.logo]
26      logoText = "fbtd's blog"
27      logoHomeLink = "/"
28
29    [languages.en.menu]
30      [[languages.en.menu.main]]
31        identifier = "about"
32        name = "about me"
33        url = "https://www.fbtd.ovh"
34      [[languages.en.menu.main]]
35        identifier = "github"
36        name = "github profile"
37        url = "https://www.github.com/fbtd"
38      [[languages.en.menu.main]]
39        identifier = "mail"
40        name = "mail"
41        url = "mailto:fabiano.taddei@fbtd.ovh"
42
43[markup]
44  [markup.highlight]
45    lineNos = true
46    lineNoStart = 0
47    lineNumbersInTable = false
48    style = 'igor'
49    tabWidth = 4
…and that’s it! run hugo to populate the public folder with html, css and everything else
preview#
HUGO includes a development webserver: hugo server --buildDrafts --noHTTPCache --watch
will serve our blog on localhost, port 1313, watching the filesystem for changes and updating the pages accordingly
Content#
We are ready to add some posts to our blog: hugo new content content/posts/initial_post.md
This creates a new post, based on the archetype in themes/terminal/archetypes/posts.md
Markdown#
Posts and other pages are rendered from markdown files. In addition to the standard markdown syntax, HUGO supports github flawored markdown and shortcodes.
FrontMatter#
Each page can start with a front matter to add some metadata
Example#
This page, content/posts/setting_up_the_blog.md, has been generated used the following markdown file (truncated)
 1+++
 2title = "setting up the blog"
 3date = "2025-07-19T00:31:40+02:00"
 4author = "fbtd"
 5description = ""
 6showFullContent = false
 7+++
 8Using [HUGO](https://gohugo.io/) instead of a fancy CMS, it took no time at all.
 9# Goal
10Use an already overworked [raspberrypi](www.raspberrypi.org) to serve a staticly generated Blog
11If you are reading this, it means it worked!
12<!--more-->
13# Components
14from the lower layer up, let's go!
15## Hardware
16My good old [raspberrypi](www.raspberrypi.org), somehow still running after too many years of service.
17...- lines 1-7: TOML front matter
- line 9:
#, a title, gets transformed into a<h1> - line 12: the content preceding
<!--more-->will be used as description for this post in the home, if no description is given in the front matter - line 15:
##becomes a<h2>and so on - line 16:
[LINK NAME](www.link.name)will be turned into something like<a href="www.link.name">LINK NAME</a>
code blocks#
There are several ways to include code blocks, and the Terminal theme the adds a couple of nice ones, check out the showcase
deployment#
Running hugo again updates the public folder. All that’s left is to make it available to nginx,
in my case using scp to copy the files over to the raspberrypi.
here is the simples possible CI/CD (just remember to chmod u+x deploy.sh)
0# FILE: deploy.sh
1#!/usr/bin/env bash
2
3set -e
4
5hugo "$@"
6scp -r 'public' raspberry:/home/fbtd/blog/- line 3: exit if any command fails
- line 5: all args passed to the script are forwarded to the hugo commands
./deploy.sh
# Start building sites …
# hugo v0.148.1-98ba786f2f5dca0866f47ab79f394370bcb77d2f+extended linux/amd64 BuildDate=2025-07-11T12:56:21Z VendorInfo=gohugoio
#
#
#                   │ EN
# ──────────────────┼────
#  Pages            │ 11
#  Paginator pages  │  0
#  Non-page files   │  0
#  Static files     │  7
#  Processed images │  0
#  Aliases          │  2
#  Cleaned          │  0
#
# Total in 27 ms
# index.xml                                   100% 1249     1.3MB/s   00:00
# og-image.png                                100%   22KB  10.1MB/s   00:00
# terms.min.b81791663c3790e738e571cdbf8023123 100%  183   456.0KB/s   00:00
# ...
# index.html                                  100%  319     1.1MB/s   00:00
Done! if nginx is working properly the blog is now available at blog.fbtd.ovh